top of page
This site was designed with the
.com
website builder. Create your website today.
Start Now
Home
Tutorials
Viz Tutorials
Tools
Contact
More
Use tab to navigate through the menu items.
The Book of Maya
NON-MAYA
TUTORIALS
Non-Maya Sculpting
All Categories
Play Video
Play Video
14:59
Substance 3D Painter First Steps: 01 - Creating a Project, Materials & Masking | Adobe Substance 3D
In this introductory video for Substance 3D Painter, you'll learn how to set up your first project, how to add materials and how to do masking. You can download all required files here: https://substance3d.adobe.com/tutorials/courses/First-Steps-with-Substance-3D-Painter Subscribe to Adobe Substance 3D: https://adobe.ly/3Um7q3t Learn more Adobe Substance 3D: https://adobe.ly/3NW3GSo About Substance 3D Adobe Substance 3D is a complete suite of smart creative apps and high-end content that gives artists everything they need to create 3D digital content. With Substance 3D, set up the perfect shot, explore the high-end 3D asset library, give life to your 3D art, build complex models, and more. Get the Adobe Substance 3D Collection. This channel will showcase what’s possible with Substance 3D, from inspiration to in-depth tutorials. Make sure to subscribe to the channel for videos on all things Substance 3D related, including content around Designer, Painter, Modeler, Stager, and Sampler. Connect with Adobe Substance 3D: Twitter: https://Twitter.com/substance3d Facebook: https://facebook.com/adobesubstance3d Instagram: https://instagram.com/substance3dart LinkedIn: https://linkedin.com/company/substance3d Discord: https://discord.com/channels/179919948569640960/179930830955610112 #Adobe #AdobeSubstance3D #AdobeYouTube Substance 3D Painter First Steps: 01 - Creating a Project, Materials & Masking | Adobe Substance 3D https://www.youtube.com/watch?v=mv6pg1O9vEQ
Play Video
Play Video
01:12
Substance Painter 2021 Getting Started - Course introduction
This is a project based course where we will texture a robot asset from start to finish. The course is divided into 5 videos where each video builds upon the previous lesson. This course also comes with a full workbook, which details each step shown in the videos. At the end of this course, you will have built a basic foundation for texturing in Substance Painter that you can further expand as you continue to learn and grow as a texture artist. The full playlist can be found here; https://www.youtube.com/watch?v=-ZbmRsOnApk&list=PLB0wXHrWAmCwnqWfKdGEmbtSKN2EzvLrY Project files and workbook can be downloaded from Substance Academy: https://substance3d.adobe.com/tutorials/courses/Getting-Started-with-Substance-3D-Painter-2021/youtube--ZbmRsOnApk
Play Video
Play Video
01:14:41
Substance Painter: Leather and Fabric Backpack Demo
00:00:00 Intro 00:01:58 Leather References 00:05:02 Leather Base 00:09:03 Raw Edge 00:15:04 Stress Damage 00:19:34 Folds and Roughness Breakup 00:24:32 Final Touches 00:31:17 Embossing 00:40:44 Sticker 00:54:48 Fabric Overview 00:55:14 Fabric Base 01:03:47 Leather Pocket Patch 01:08:07 Stiches 01:12:08 Finishing Up --------------------------------------------- Link to 3D Model: https://www.cgtrader.com/3d-models/character/clothing/h-andybag-canvas-backpack-3d-model
Play Video
Play Video
01:00:55
Substance Painter: Wooden Door demo
Play Video
Play Video
33:21
3. Texturing a Vintage Watch in Substance Painter | Texturing Tutorial | Learn Step by Step
This is a step-by-step Texturing tutorial of a Vintage Pocket Watch in Substance Painter. This video is a part of creating an object using Maya and Substance Painter. In this series, I am showing the entire pipeline in detail Modeling-Unwrapping-Texturing-Rendering in 4 videos. If you go through the entire series I am quite sure that you will be able to make a 3D object and your understanding will be strong. Only I am assuming you know the basic interface of Substance Painter. Queries solved in the video: 1. How to Texture a Vintage Watch in Substance Painter? 2. How to texture a prop? 3. How to do texturing in Substance Painter? 1. Modeling a Vintage Watch in Maya https://youtu.be/L2LF7JFU4e4 2. Unwrapping of a Vintage Watch in Maya https://youtu.be/zlElPqqtXu8 3. Texturing a Vintage Watch in Substance Painter https://youtu.be/joexOx7WCrw 4. Rendering of a Vintage Watch in Maya https://youtu.be/Q04oWt1ozY8 Music: YouTube Music #3DTexturing #SubstancePainterTutorial
Play Video
Play Video
17:05
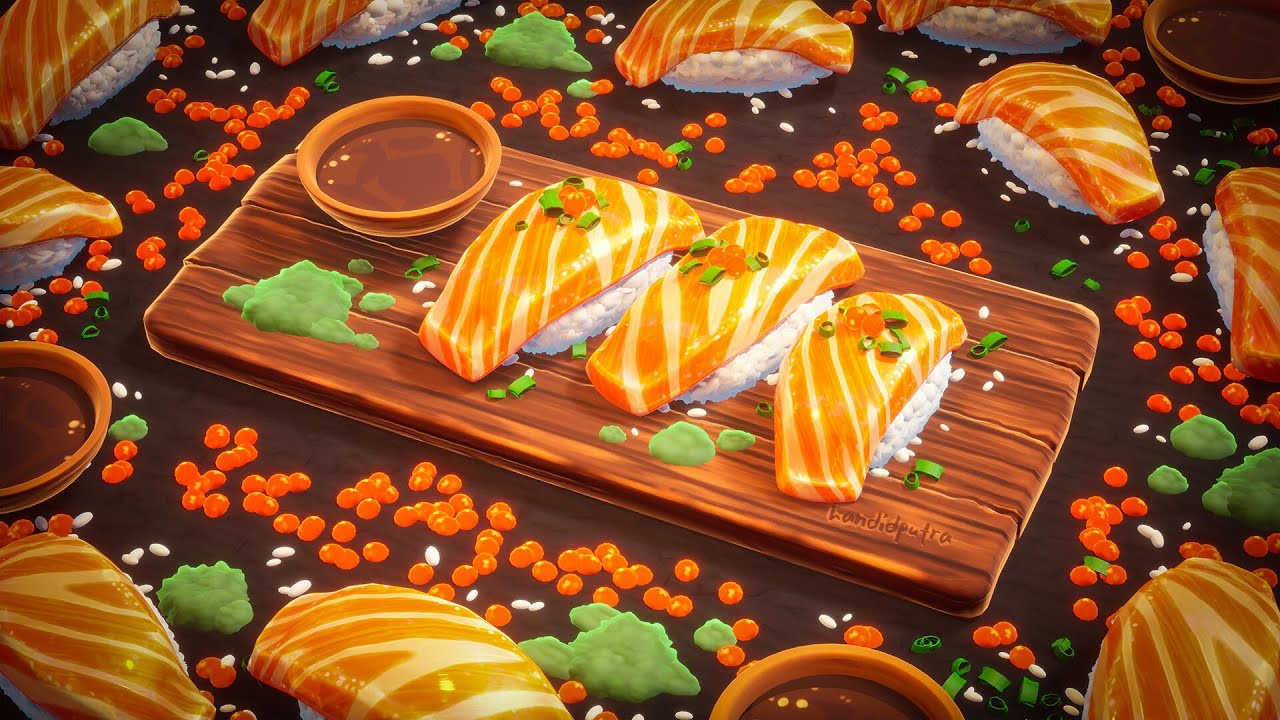
Mastering Stylized PBR Texturing Using Substance Painter
Learning Stylized Texturing in Substance Painter is a challenge any budding stylized artist faces. You may have noticed the incredible 3D render in the thumbnail, but how do you achieve such incredible, 2D/Ghibli-esque looking results in Substance Painter while only using low poly models? In this episode, Handi stops by Stylized Station to share how he created his stunning Sushi scene, and shares a ton of cool tips and tricks to take your stylized texturing in Substance Painter to the next level. Be sure to check out more of Handi's handywork on Artstation: https://www.artstation.com/hdp 🎨The 3D Coloring Book🎨 Transform your Substance Painter texturing skills with HUNDREDS of professional-level assets, and hours of high quality tutorials 🎉 Join here: https://bit.ly/31QPGlq 💖Support Stylized Station💖 These tutorials remain 100% free thanks to the amazing support from our Patrons. To ensure these tutorials stay free and to gain early access to every video, consider joining our Patreon community. https://www.patreon.com/StylizedStation Check out https://stylizedstation.com for tons more tutorials, workshops and inspiration from the game art community! Follow me on all the socials: YouTube: https://youtube.com/c/stylizedstation Twitter: https://twitter.com/StylizedStation Instagram: https://www.instagram.com/stylizedstation Come join us on discord! We have the world's largest discord for sharing stylized art. https://discord.gg/tbP6b6z
Play Video
Play Video
18:22
Nomad Sculpt: Cartoon Characters Workflow
Érika shows you her workflow to create characters from stratch and later sculpt them and pose them in Nomad Sculpt. Support us on Patreon for assets: http://www.patreon.com/smallrobotstudio Get assets on our Gumroad Store: http://www.gumroad.com/smallrobotstudio Check out more Small Robot Studio: http://instagram.com/smallrobotstudio http://smallrobotstudio.com Check out more or Érika’s Work: http://www.erikacasab.com http://www.instagram.com/erikacasab Stay up to date on Facebook: http://facebook.com/smallrobotstudio
Play Video
Play Video
06:26
Easy Posing in Nomad Sculpt | Quick Tutorial
This video just scratches the surface! If you like my style and want to go more in depth, I recommend my beginners Skillshare Course: https://skl.sh/3FbdNh2 👈🏾 Why are my shapes pixelated? https://youtu.be/vwczhZphXns 👈🏾 Nomad Sculpt Cheat Sheet - https://youtu.be/JiTFvu6F2y0 👈🏾 ROUND EDGE, SMOOTH COLOR: https://youtu.be/JiTFvu6F2y0 👈🏾 Updated BEGINNER Tutorial: https://youtu.be/42Qak3b0bPE 3D Environment: http://drugfreedave.gumroad.com/l/Environmenteyeglare Round Edge Brush (3D): https://youtu.be/LZEBZVwD1g4 Free Beginner Tutorial: https://youtu.be/B7nma93bM60 How to UV Bake: https://youtu.be/4MB7s9ORFBU Lower Poly Count: https://youtu.be/I6Zlbag1wUI Add Environment: https://youtu.be/nCQIz5wLYLs How to BLEND Smoothly: https://youtu.be/07KYBgbl3GE How to LIGHT your scene: https://youtu.be/Ai-4F_AogKg Instagram: http://Instagram.com/Drugfreedave TikTok: http://Tiktok.com/@drugfreedave Support: http://paypalme/davereedart ❤️ https://www.buymeacoffee.com/drugfreedave (Pancakes 🥞) *DRAWING & TUTORIAL EQUIPMENT* (Affiliate links) Ipad Pro 2021 12.9in: https://amzn.to/2X8mAOw Procreate App - https://procreate.art/ipad Apple Pencil 2 Tips: https://amzn.to/3IOMDwy Apple Pencil 2 Grip: https://amzn.to/3udDwkT Apple Pencil 2 Full Length Grip: https://amzn.to/3AKJiM6 Sketchboard Pro: https://sketchboardpro.com/ *VIDEO* Iphone 13 Pro: https://amzn.to/3gc8vp6 Smallrig Arm & Clamp: https://amzn.to/3z4xLqL Overhead Recording Mount: https://amzn.to/3iYJCPH Apple HDMI Dongle: https://amzn.to/3IR8qDC Elgato Camlink Capture Card: https://amzn.to/3s68clg Macbook Pro 14in M1: https://amzn.to/3AIaoUa Sony a7iv Full Sensor Camera: https://amzn.to/3TMd7We Tamron 17-28mm Wide Lens: https://amzn.to/3TI4pIh Sony Bluetooth Grip/Tripod (GP-VPT2BT) https://amzn.to/40B5pjM Ulanzi Arm Clamp: https://amzn.to/40zbHAl Ulanzi RGB Light (With diffuser): https://amzn.to/40epA7p G1S RGB Light: https://amzn.to/42C8LVw Neewer Lights: https://amzn.to/42GLnX2 Neewer Diffuser: https://amzn.to/40EeOY1 Canon M50 mark ii: https://amzn.to/3V8P9Dl (with sigma Lens) Sigma 16mm 1.4 canon ef-m: https://amzn.to/3BMJRa6 BenQ SW321C 32: https://amzn.to/3jiiJt7 *AUDIO* Rode VideoMic NTG Rode NT-USB Mini: https://amzn.to/3oewk47 Please leave a comment below and let me know what you think! Thanks for watching the video, and for your support!
Play Video
Play Video
08:15
zBrush 3D Printing Pt. 1 - Preparing your model
So I've been 3D printing for a few months now and I wanted to share my process of taking a model from zBrush to real life! This is a 3 part tutorial so make sure you check out the following videos. For your reference I'll be using a Flash Forge Creator Pro 3D printer and printing in ABS but you can follow this tutorial with whatever printer you choose and it should mostly work the same. You may also use this tutorial to prep a model for shapeways or other 3D printing houses. Hope this was useful, check out more of my stuff: http://instagram.com/smallrobotstudio http://michaelrew.tumblr.com
Load More
bottom of page